Big Animals – Mako Sharks, USA, Portugal
|
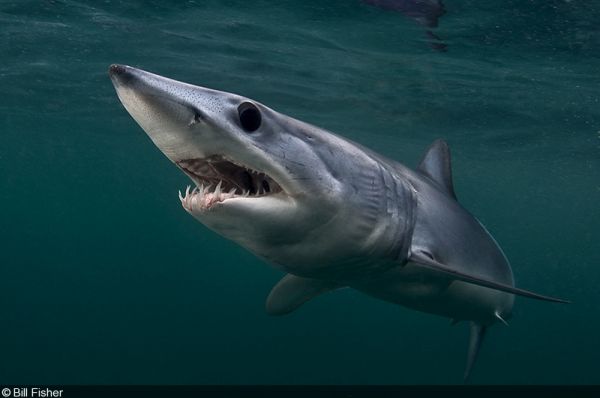
Shark photographers can’t get enough of the huge black eyes and jagged teeth of mako sharks. Makos are rarely seen by divers because they live offshore in deep water, but with a little chum they can sometimes be brought close to boats. Although potentially aggressive, makos seem not to mind snorkeling photographers and can get quite close. RHODE ISLAND, USASurprisingly, one of the best destinations for reliable encounters with mako sharks is just a two-hour drive north of New York City. Leaving from a small Rhode Island town, specialized shark photography boats use chum to attract the often shy, but incredibly fast makos. When to DiveThe official season for mako photography is from May through September. However, usually the most frequent encounters begin at the end of June. Pro Tips When setting out to photograph shortfin makos, the most important thing you’ll need to have is patience. You’ll be searching the vast open ocean looking for one of the more difficult sharks to find. If it were easy, everyone would have countless mako images.
When a mako arrives, the next thing is to remember to be quiet. You need to let the shark get acclimated to the boat. These are not reef sharks that are habituated to people, or boat engines; they’re open ocean hunters who simply want nothing to do with us. They will sense the commotion if everyone on the boat gets too loud or excited. The shark needs to get comfortable before anyone gets in the water. If it feels threatened in any way, it will simply leave the scene, never to return.
If a mako arrives when you are already in the water, consider yourself lucky, and let the shark come to you. Whatever you do, don’t chase the shark, or immediately start flashing your strobes. Remain calm, and give it time to get acclimated to the boat, and to any divers in the water.
I’ve only ever photographed makos while snorkeling at the surface. My approach is to let the sharks come to me, stay put, and wait for my shot. When you get a cooperative mako, you’ll have plenty of opportunities to capture good images.
Don’t look through your viewfinder while your head is close to the surface—shoot from the hip, or even lower. Unless you are an experienced free diver, you’ll be staying at the surface. Hold your camera as low as you can, aiming upwards, to get under the shark. This will get you the best angle for good shots, and also let you look at this amazing shark eye to eye. I have missed many Mako shots simply because I’m continually amazed with their presence, and have sometimes forget I even have a camera in my hands. They are one of the most impressive sharks an underwater photographer could ever hope to encounter.—Bill Fisher
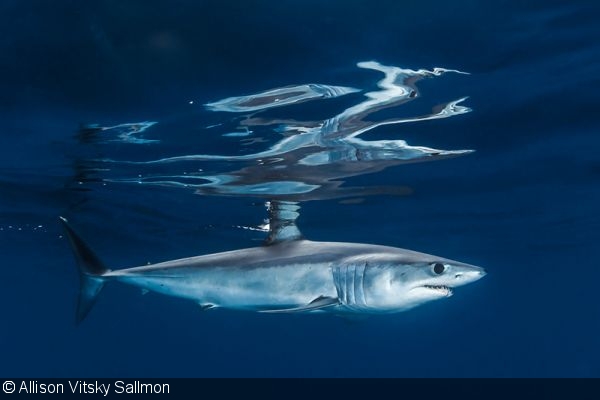
SAN DIEGO, CALIFORNIAHead to the west coast of the United States for another frequent encounter with mako sharks. Photographing makos in California provides a blue water background that is rare in New England waters. There’s also other big animal rarities to be stumbled upon: blue whales, mola mola and blue sharks have all been photographed here. Recommended OperatorsWhen to DiveMakos can be seen in Southern California throughout the year.
|
Pro TipsMy go-to shark lens is a 16–35mm zoom, and I have shot them with and without strobes, depending upon circumstances and conditions.
Makos are fast, and if there are more than a few large ones in the water, I start to consider my own comfort, to be perfectly honest with you! Because they are so fast, you will need to use a fast shutter speed, which may also impact whether you choose to use strobes or not, owing to synchronization speed considerations. Spray and pray all the way for these guys!
The best way to avoid backscatter is to stay out of the densest chum line, but that’s not always an option, in which case freediving below it might help. Calm seas are helpful to prevent a mishmash of bubbles and chum, but again, not always an option, since the swell size tends to increase the farther offshore we plan to go. AZORES, PORTUGALIt seems like the Azores offer up basically any big animal encounter you can think of—and that includes the rare mako shark. Head a few miles offshore to photograph the stocky and muscular mako, and even stumble upon dolphins, sperm whales, and mobula rays. Recommended OperatorWhen to DiveThe mako season in the Azores runs from mid-July through October, depending on weather and wave conditions. Pro TipsDiving with blue and mako sharks is mostly done in high seas near the surface, hanging on a safety line under the boat, or just drifting with the boat at shallow depths (5 to 10 meters). Thus, this is a great opportunity to get some dramatic scenes, correctly balancing available light with strobe light to expose the shark.
Keep in mind that on days with clear blue skies, you will want to use a fast shutter speed—preferably the highest flash sync speed your camera allows, generally 1/200th or 1/250th of a second—to “freeze” the action, which could mean you will have to crank up your ISO or open up your aperture.
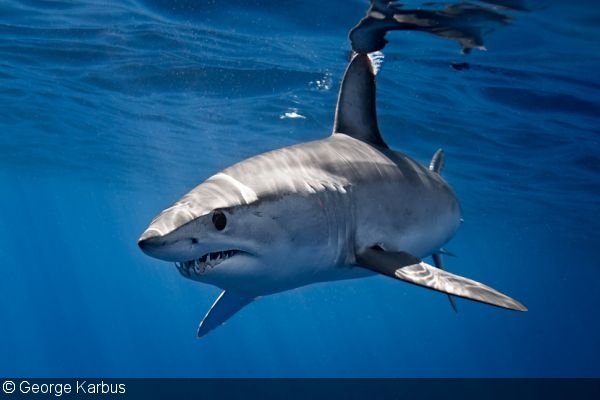
Makos being oceanic predators used to feeding on the surface, this is also a great opportunity to take some “splits” or “over-unders.” Use a fisheye or wide-angle zoom and as big a dome port as possible. Exposure (ISO, shutter speed, and aperture) should be adjusted so that the sky/landscape is correctly exposed. A good depth of field is recommended, as you will want the shark and the distant landscape sharp. You can then adjust your strobe power to correctly light the sharks. Another important issue is keeping your focus locked on the shark. You can do this by selecting manual focus and pre-focusing to about 50cm in front of you (50cm in the watter as you are focusing on the virtual image created in your dome) or by choosing one or a group of focus points on the bottom half of your frame.—Nuno Sá (Image by George Karbus)
|
RELATED CONTENT
Featured Photographer


 Antarctica


