Photographing Whale Sharks
The world’s biggest fish is arguably the ultimate prize for underwater photographers. Reaching 40 feet in length, the whale shark (Rhincodon typus) is a slow moving filter feeder; but despite its docile nature, finding and photographing whale sharks isn’t always easy. Here’s your ultimate guide for capturing a winning whale shark image.
Where to Find Whale Sharks
Whale sharks can be found in all tropical and warm-temperate waters. The fish are largely pelagic, staying in the open ocean. Thus, chance encounters with whale sharks in most diving locations are possible, but extremely rare.
1. Isla Mujeres, Mexico
2. Cenderawasih Bay, Indonesia
3. Oslob, Philippines
4. Galapagos
5. Cocos Island
Instead, the best opportunities to photograph whale sharks are when predictably come to sites to feed. Some locations are more reliable for encounters than others: The convergence of currents and proliferation of nutrients in locations like the Galapagos and Cocos Island make sightings reliable during specific times of year.
Other locations provide feeding aggregations by the hundreds. Perhaps the best known takes place in the waters near Isla Mujeres, Mexico beginning in the late summer. Here, countless whale sharks and manta rays converge to feast on the eggs of spawning fish.
Several other notable whale shark hot spots are the results of feeding interaction with fishermen. In Cenderawasih Bay, Indonesia and Oslob, Philippines, whale sharks snack on the fishermen’s catch, which has turned into underwater photography destinations in recent years.
In recent years, new destinations for photographing whale sharks have appeared in Mexico, Indonesia and the Philippines.
Equipment for Photographing Whale Sharks
Whale sharks are huge. It seems obvious for an animal whose moniker is “world’s largest fish,” but you only realize it the first time you stare down the throat of a bus-sized whale shark.
As such, DSLR and mirrorless users will want to select the widest lens in their arsenal. Ideally, it should be either a fisheye prime or fisheye zoom lens: Both offer up to a 180-degree field-of-view and reduce the minimum focus distance, meaning you can get as close as possible to the shark and still fit it in the frame. In current-ridden conditions (Galapagos or Cocos) you can reduce drag by using a small dome port. In calm conditions, or when snorkeling instead of diving, using a large dome opens up the option to take over-under images.
Using a fisheye lens will allow you to get close to the massive whale sharks and still fit their entire body in the frame.
In a similar vein, compact users will really need to use a fisheye wet lens on top of their camera’s built-in lens. The wet lens increases the field of view (up to 165 degrees) and dramatically minimizes the minimum focus distance. Without this addition, compact users will either cut off part of the subject or be too far away when you can fit it in the frame.
Strobes are a valuable asset in most diving conditions—light disappears quickly at depth, and artificial light can add color and contrast. When snorkeling or freediving with whale sharks, strobes are often unnecessary given the amount of available light at the surface. It’s also against local regulations to use strobes in these situations for fear of startling or harming the animal. Make sure to ask your dive guide about the local rules.
Whale Shark Photography Techniques
Once in the water with the whale shark, it’s pretty easy to get a proof shot that you’ve just swam with the world’s largest fish. But if you want to step up your photography another notch and produce some award-winning images, here are a few tips.
Use Big Strobe Arms: If you’re traveling to a destination where you plan to be SCUBA diving with whale sharks, make sure to pack long strobe arms. When illuminating something with a 10 foot wide head, you want your angle of coverage from the strobes to be as wide as possible. It will also help reduce backscatter in destinations rich with nutrients in the water column, like the Galapagos.
Practice Freediving: We aren’t all professional freedivers, but that doesn’t mean you can’t improve your skills a bit. This is especially important when photographing whale sharks in snorkel spots like Isla Mujeres and the Philippines. General aerobic fitness will increase the amount of time you spend underwater, combined with practicing your descent and ascent. Being able to freedive comfortably to 20 feet will open up more angles of shooting (like silhouettes and sun balls) than just staying at the surface.
Being able to freedive down will allow you to frame the shark against clear blue water and eliminate unwated snorkelers and backscatter from the image.
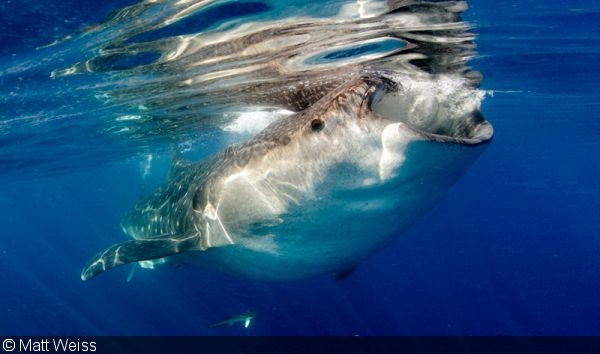
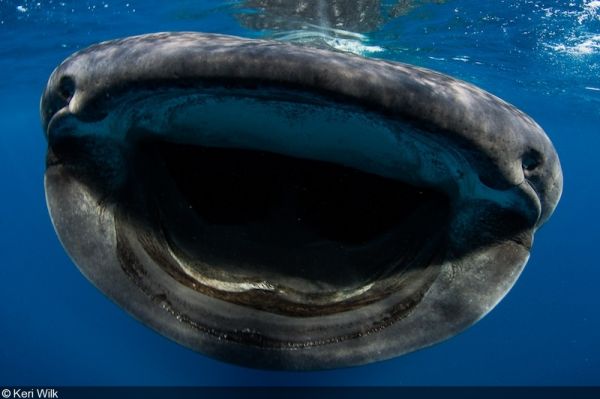
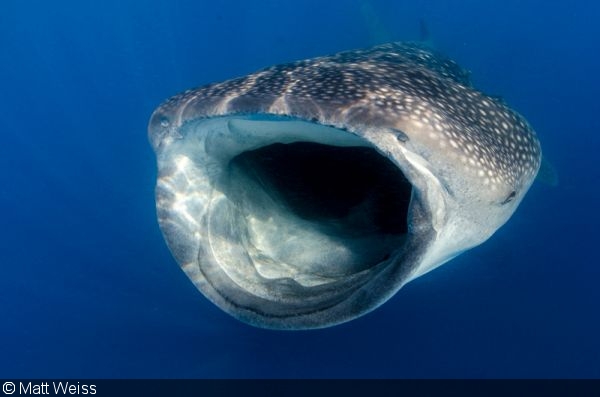
Capture Feeding Behavior: One of the most dramatic images you can take of a whale shark is with its mouth wide open in the middle of feeding. This is common in Isla Mujeres, where the sharks shift into a vertical position to feed, called a "botella." The sharks can also be captured filter feeding on the move. But make sure to start kicking fast: The sharks move much quicker than you think!
Say "ah"- the open mouth, feeding shot is the most prized for whale shark behaviors. It can be photographed when the sharks gather for feeding, such as off the coast of Isla Mujeres, Mexico.
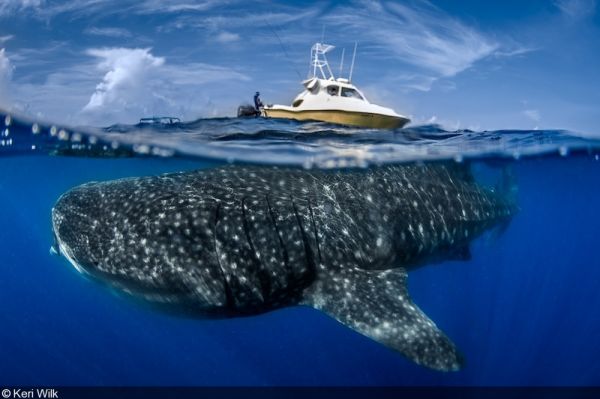
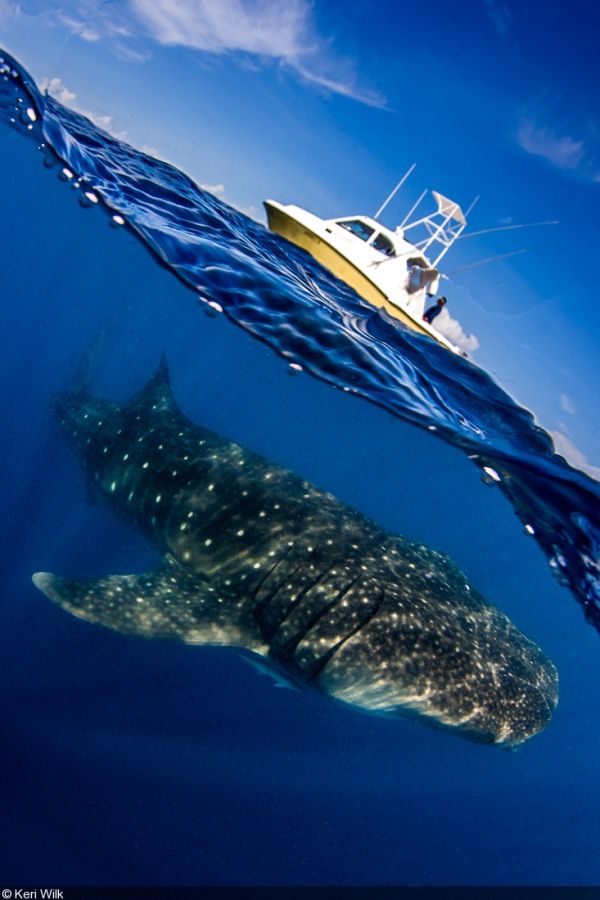
Take a Split Shot: When photographing the whale shark near the surface, try capturing a split shot with the fish underneath and the topside scene above. In some cases, the above subject might be boring: Just clouds or sky. But in other locations, you may be able to capture unique interaction with fishermen, either in a boat or on a floating platform.
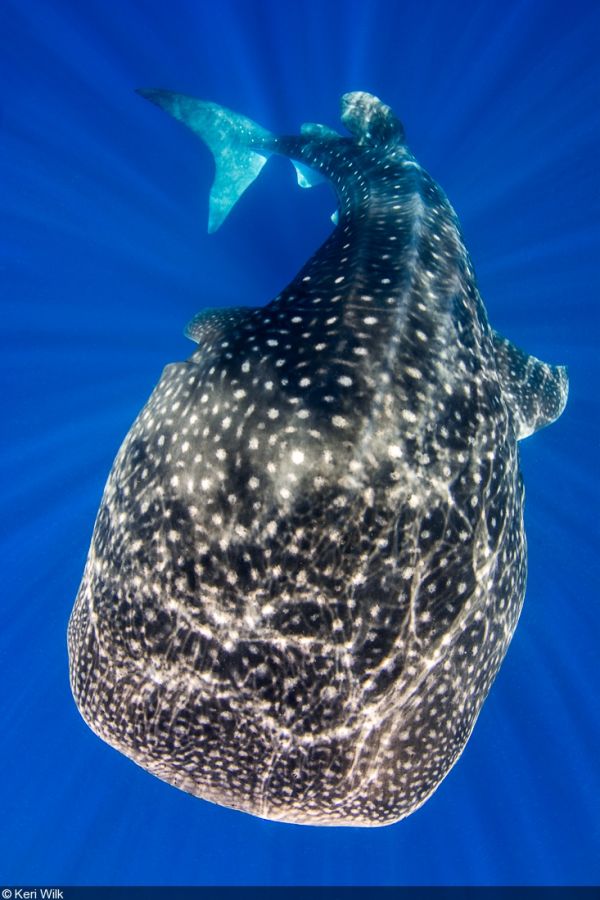
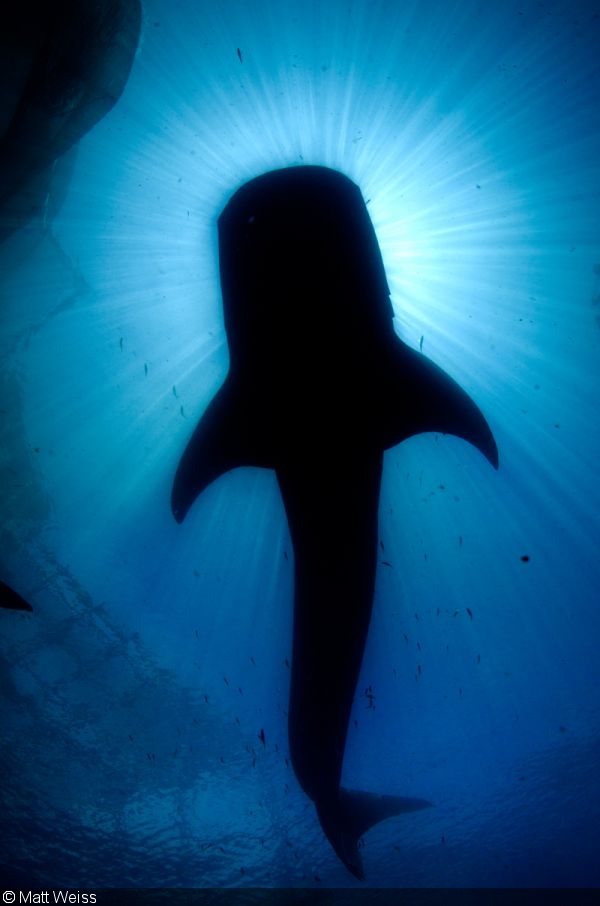
Silhouette Shot: Whale sharks have a unique shape that makes them perfect subjects for a silhouette. Whether on SCUBA tank or freediving, the key to a good silhouette image is contrast, ideally provided between the dark shape of the subject and the sun-drenched water above.
For a really unique image, dive underneath the whale shark and capture its unique shape in silhouette form.
Final Thoughts
The chance to swim alongside the world's largest fish is an amazing encounter on its own. It can be difficult, buy you might want to try just taking in the moment before reaching from your camera. Once you do decide to snap away, hopefully the tips laid out in this article will help you nail the shot.
RELATED CONTENT
Featured Photographer

 Antarctica


