Shark Diving Photography
Over the last decade, underwater photography has been graced with new technology, equipment. and (most of all) spirit. Today, a person without any real knowledge of cameras and general photography can take a decent photo underwater. The real challenge comes when you decide to make one of the ocean’s largest apex predators the subject of that photograph.
This article aims to give helpful tips and techniques for photographing sharks successfully in different conditions. During the last 10 years, I have focused on honing and perfecting the skill set necessary to capture these magnificent creatures through the lens of my camera.
My love for photographing sharks goes hand in hand with my desire to accurately portray their beauty and highlight the vital role they play within our ocean’s ecosystem. Sharks can no longer withstand the inaccurate stigma society has attached to them as being nothing more than mindless killing machines chasing after bikini-clad beach babes.
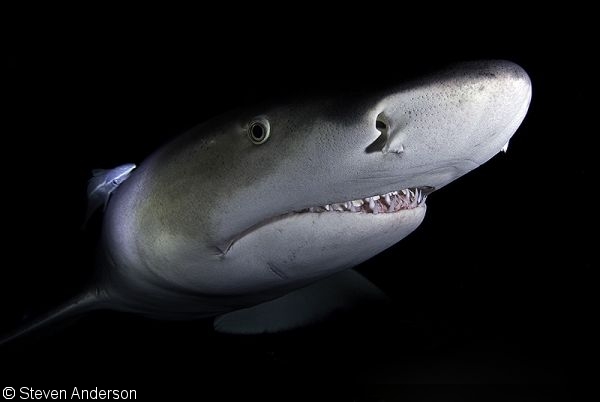
Shark dives are a great opportunity to photograph these apex predators in a way that helps change negative perceptions
Choosing a Destination for Shark Photography
Sharks can be found throughout all of our oceans. Unfortunately, a large percentage of our sharks have been decimated by overfishing, and another large portion sadly falls prey to the inhumane fin trade. However, thanks to ongoing efforts to raise awareness about this issue, there are still destinations that exist where healthy shark populations can be found.
In the past, I have used periodicals and social media for advice and information regarding the best places to see and photograph sharks. Different destinations provide different encounters, scenery, and photo opportunities. There are different seasons and different locations that provide good shark diving experiences for different species. For example, the Bahamas is known for its healthy reef system, which attracts a variety of sharks such as lemon, reef, and tiger sharks.
1. Bahamas
2. Galápagos
3. South Africa
4. Mexico (Guadalupe and Cozumel)
5. Cocos
Other locations such as Guadalupe, South Africa, and Australia are known to provide opportunities for photographing great whites. Places like the Galápagos Islands provide a perfect opportunity to capture images of schooling hammerheads, while Mexico is touted as the best location to photograph whale sharks. Ultimately, your chosen location comes down to deciding upon the species of shark that you want to photograph and the setting that is desired. Consult DPG’s interactive Big Animals Underwater Photography Guide for more destination information.
It can be argued that the Bahamas is the top shark photography destination. I like the fast travel time to get there. My time is limited and I try to get places quickly to use my time efficiently. I love the clear blue water of the Bahamas, which provides plenty of food and nutrients that make the reefs so healthy. And because the reefs are healthy, the sharks are healthy and in abundance. Tiger, lemon, bull, reef, and oceanic whitetip sharks are constantly present, with great hammerheads visiting in the winter months. Not to mention the docile nurse sharks and the occasional whale shark.
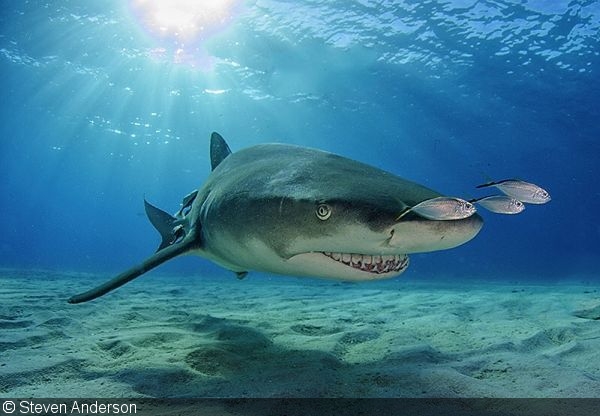
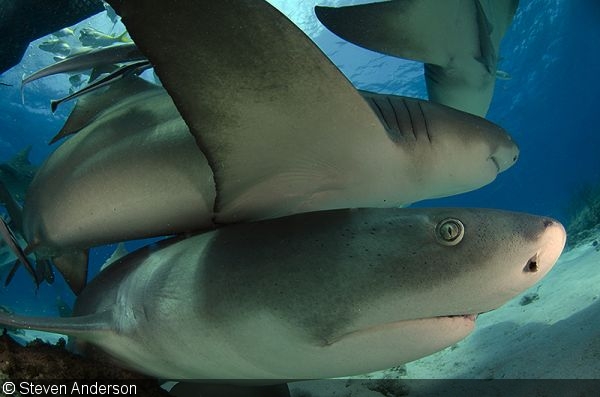
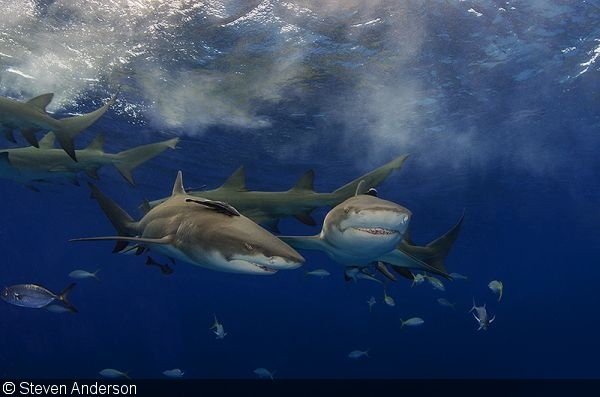
The Bahamas is considered a top destination for shark photography, with lemon sharks (above), tiger sharks, hammerhead sharks, reef sharks and more in a single location
Types of Shark Dives
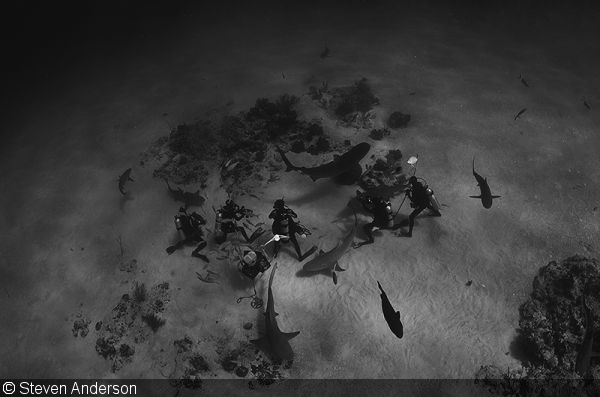
When considering the desired setting for your pictures, it is important to remember that the setting can be largely influenced by the type of dive you choose to do. For example, the Bahamas offers two different types of shark dives that will enable a diver to experience the sharks in various ways. One type of dive might offer close and personal feeding. This dive is popular among tourists who may desire nothing more than the phenomenal experience of being up close with these amazing creatures. For a photographer, the advantage of this type of dive is the ability to capture images of sharks with their mouths open as they are being hand-fed. Of course, the disadvantage is the high likelihood of having people in the foreground of the shot as well.
The second type of dive is one where the waters are chummed, or baited. The bait could be in a crate or floating openly in the water in order to draw a large number of sharks to the area. Comparatively speaking, this dive still increases the photographer’s odds of capturing good photos due to the number of sharks attracted to the baited water, while also decreasing the odds of having unwanted human subjects in the shot.
Yet another type of shark dive is a “cage dive.” This method allows for sharks to be observed and photographed using a cage for protection when diving with the ocean’s number one apex predator, the great white.
Finally, there is a fourth type of shark dive: Using a reef hook or gloved hands to hold onto rocks while sharks drift by in the upwelling current. This is common in destinations like Cocos and Galápagos, where hundreds of schooling sharks drift lethargically in ripping current.
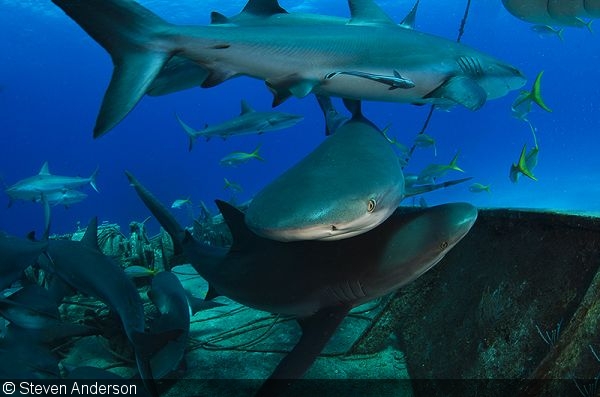
In shark feeding dives, you’ll be able to get closer to usually-shy animals—a real plus for underwater photographers
Choosing a Dive Service for Shark Photography
Again, social media, along with fellow underwater photographers and trusted website travel sections will be helpful in choosing the service one uses. Below are a few questions to keep in mind when choosing the right operator:
- What is the operator’s safety history?
- Does the operator follow all local and international laws regarding shark diving and possible feeding?
- Do they operate using a cage?
- Do they bait the water or are they feeding the sharks?
- Do they brief all divers properly before entering the water with sharks?
- How many divers do they take on their trips?
- What type of sharks do they attract and interact with?
- What type of training, first aid equipment, and safety procedures does the operator have in place in case of injury or emergency?
When looking for the right shark diving operator, it’s a top priority that they have experience with the animals—and demanding photographers
Getting Ready for a Shark Photography Dive
One of the first steps, and arguably one of the most important, in preparing for a shark dive involves educating yourself about the behavior and habits of the sharks you will be diving with. There is plenty of information that is accessible for anyone to study before getting in the water with a specific species of shark.
Another factor to consider when preparing to do a shark dive is your overall physical fitness as it relates to diving. Often, there is a strong current that the diver/photographer will have to endure, which is why it’s important to know your body’s own capabilities and limitations. Poor cardiovascular conditioning, paired with feelings of anxiety and adrenalin, can cause a diver to make fast and erratic movements while underwater. Such movements tend to excite sharks—obviously not a behavior that you want to elicit. Having the ability to remain calm and control your breathing is of utmost importance to prevent such behavior from occurring. It will also extend the amount of time you can spend photographing these amazing animals before running low on air.
Shark dives require added attention to your surroundings, as well as a general calmness when underwater
Also consider the additional weight of the camera you will be diving with and whether or not you feel you feel confident enough in your own abilities to manage the extra gear. You should be able to swim and dive with the gear in such a way that it doesn’t cause you to flail or make any of the erratic movements already mentioned.
Another paramount step in ensuring a safe and successful dive involves a thorough pre-dive equipment check. While it is important to check your camera gear before your dive, always remember that it is of upmost importance to perform a full systems check of your dive gear as well. When you are diving with sharks, there is no time to make major adjustments underwater—not to your camera rig, and definitely not to your dive gear. My normal preparation for a shark dive involves me getting into a pool with all of my gear, and using different objects to focus on and photograph for practice. It is a full systems check of my camera gear, as well as my dive equipment.
On the day of the actual shark dive, be attentive to all instructions given during the briefing as it pertains to the behavior of the species of sharks you expect to see and photograph, as well as the detailing of all procedures and rules pertaining to the dive and boat in general. Overall, the golden rule of any dive expedition should always be to use common sense, err on the side of caution, and always allow safety to prevail.
There’s no image worth risking life or limb. Safety comes first when photographing sharks, from the preparation to the dive itself
Photo Equipment for Shark Dive Photography
I suggest using a wide-angle lens suitable for your camera. The key to most underwater photography is to get as close as possible to your subject. Photographing large animals such as sharks means getting close and using a wide-angle lens. The closer the photographer is, the less water there is between the shark and the camera’s sensor. Minimizing the amount of water in the shot will result in a picture that has less of a blue haze, and less backscatter.
Having said that, not all shark dives demand the same wide-angle lens. For example, DSLR users will do best to use a fisheye or fisheye zoom lens for up-close action during feedings and baited dives. Likewise, compact users will benefit from a fisheye wet lens in these situations. However, dives where you’re not using food motivation or hoping to photograph shyer species (great whites, hammerheads, etc.), DSLR users may be better off using a rectilinear zoom in the 12–24mm range. Don’t be afraid to ask the dive guides before the dive how close the encounters will be.
The lens you choose depends heavily on the shark species: Nurse, lemon, and reef sharks are more friendly and can best be captured with an ultra wide-angle lens
Using Strobes to Photograph Sharks
Strobes will help to add color and contrast into your photos, and will also fill in shadows and allow the photographer to capture images at higher shutter speeds, providing sharp detail.
For even lighting, I keep two strobes as far away as I can extend them from the housing for the widest angle of coverage possible. Adjustments can easily be made in individual situations. I have found over the years that having the strobes on full power does not necessarily result in better images. Caution should be taken not to overexpose the bellies and faces of the shark or sharks you are photographing.
The use of diffusers will assist in preventing the overexposure of your subject. Many sharks are attracted to the electrodes that are emitted by certain strobes, and sometimes the strobes and even camera housing can become an expensive chew toy.
Strobes help eliminate shadows on the shark’s underside and are a must for photographing these animals during night shark dives
Shark Dive Photography Tips
Get Low, Quickly: The number one consideration is that from the time you enter the water until the time you get out of the water, you should be thinking about sharks. When diving and photographing sharks, it’s best to enter the water calmly and quickly. Spending too much time at the surface can be dangerous. Often during shark dives there is surface current, which typically decreases at depth. Dropping to the bottom quickly puts you right where you need to be for photographing sharks around a feeder or bait baskets. A shark like the tiger shark often searches the surface for its food.
Teamwork with Your Buddy: Constant attentiveness and eye and arm contact with your buddy is very important. Your buddy should always see what you see, especially when curious tiger sharks are present. There’s also a photo benefit: Some of the best images capture the eye-to-eye contact between a shark and a diver.
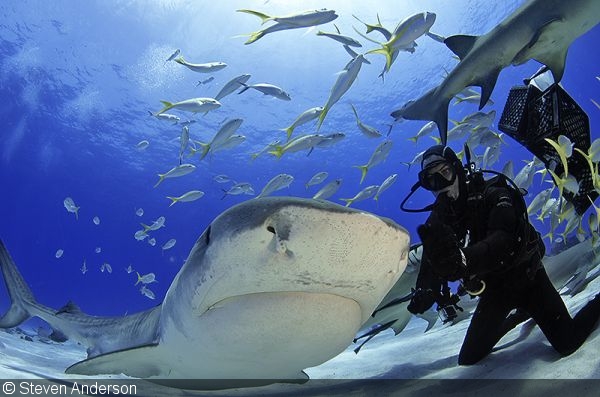
Adding another diver into your shark images helps demonstrates that positive human interaction with these predators is the norm
Watch Your Surroundings: In addition to keeping an eye on your buddy and the sharks, one needs to be aware of one’s surroundings. I often dive using a bicycle mirror attached to my strobe arms. When sharks are present and bait is on the water, always face down-current as the sharks will follow the current in and you will get great shots as they make their way up-current. Never chase after sharks; let them make their approach. I recommend being completely covered in black to increase safety.
Review Images Later: I personally do not think it’s such a great idea to review images underwater. I like to try and always have eye contact with the sharks as they approach and I stand my ground. You still have a large camera between you and the shark. Use the three-second rule, only making minor camera adjustments during this time. I always shoot in manual exposure with RAW format, which gives me full control of the camera and its abilities. I use those three seconds to make quick adjustments of aperture and shutter speed.
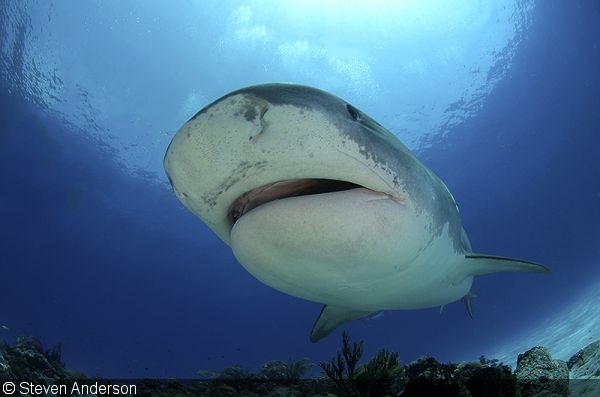
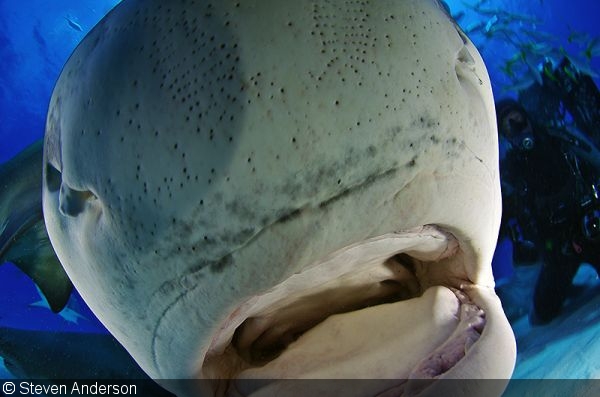
The Money Shot: The compositions I try to get are either some type of a head-on shot or dome shot. Some sharks, such as the hammerheads and lemons, have great frontal features worth capturing. For all sharks, open-mouth shots are always impactful, but be aware that such shots will be seen by some as frightening and only perpetuate the perception of sharks as “mindless man-eating fish.”
Using a fisheye lens or wet lens gives you the opportunity to capture the “money shot”—where the shark appears to pop right out of the frame
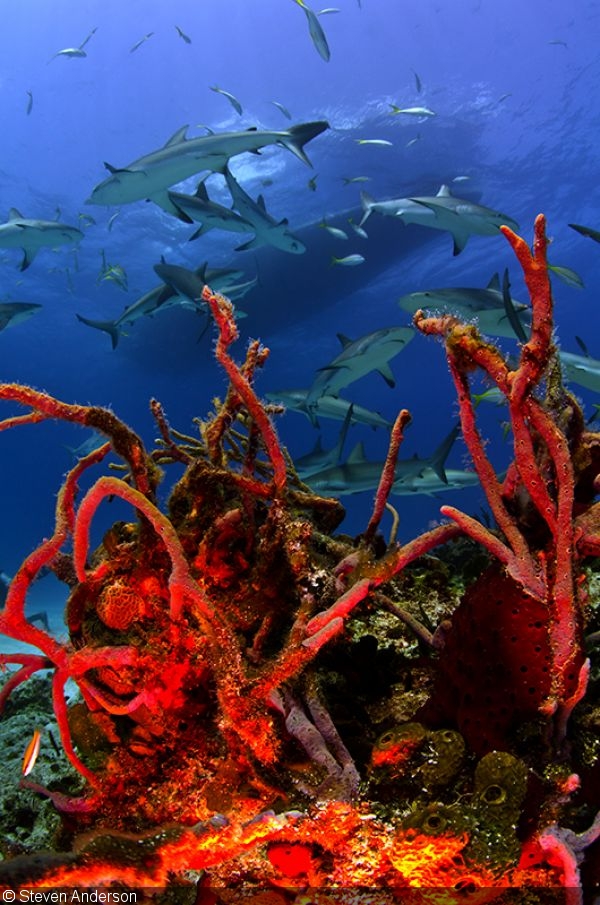
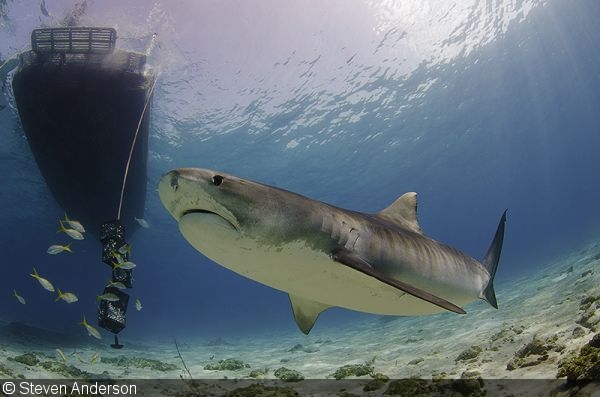
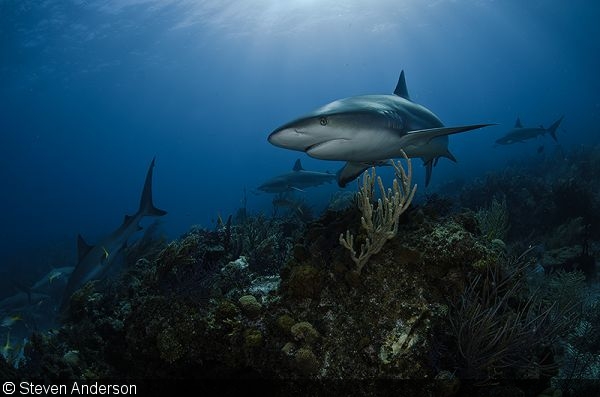
Leave the Chum Out: Photographing sharks in their natural environment by excluding any food bait can also produce beautiful images. Showing the shark swimming around the reef communicates to the reader the health of the reef system. I suggest getting as close to the shark or sharks as you can safely get and try different angles. Let your wide-angle lens do its job.
Adding the Human Element: When photographing divers with sharks, try to compose your shot by putting the diver in front of the shark heading towards the diver. I often put the diver behind the shark at a distance that provides a bit of perspective and true wide-angle.
Don’t Forget the Safety Stop: I enjoy making good use of safety stops when diving with sharks. Photographing in the open water column requires good buoyancy. I often use the down line to hold onto when reaching the surface to photograph over-under images, or using the dive platform and holding my camera steady splitting the surface with the dome of my camera housing. On a sunny day, strobes are not needed and can cause your images to be blown out.
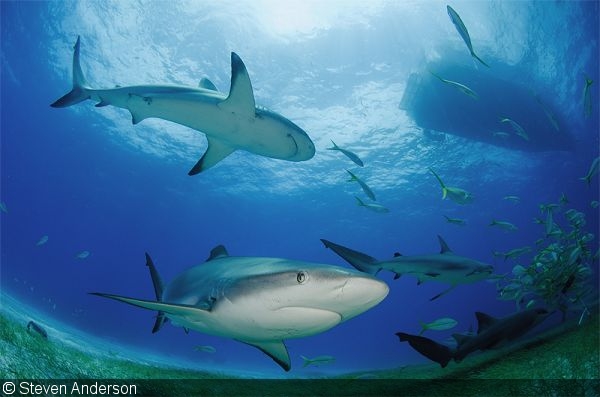
The safety stop on a shark dive is a great chance to capture images of sharks in the open water column, or even over-under pictures
Joining the Effort for Conservation
I hope that this information is useful to all those photographers who are thinking about diving and photographing sharks. Photographs can be a very helpful way to show the peaceful co-existence between humans and sharks, as well as the benefits of these formidable predators in our oceans. So get that wetsuit on and join us in spreading the word about the vitally important role sharks play in the marine food web.
By following some of these techniques, you too can create images that help spread a positive message about the value of sharks in our oceans
RELATED CONTENT
Featured Photographer

 Antarctica


