Camera Tilt Composition
When it comes to creating visually interesting compositions in underwater photography, it’s all about the lines—specifically diagonal lines.
If you’ve read our introductory guide to underwater photography composition then you know diagonal and leading lines are used to create dynamic compositions suggesting movement or to draw attention to a specific part of the frame. This works with a number of underwater subjects that are naturally at an angle, such as a hovering pipefish or manmade structures like shipwrecks.
However, many underwater subjects aren’t naturally positioned on a diagonal angle—and you don’t want to manipulate them in anyway—so how do you create diagonal lines? Let’s go Dutch with this.
Diagonal lines and curves create a much more dynamic composition in an image than lines parallel to the side of the frame
The Dutch Angle in Underwater Photography
When we say, “let’s go Dutch,” we aren’t referring to the popular expression of splitting the check. Rather, it’s a reference to a camera shot where the camera is tilted on its axis so that any vertical/horizontal lines that would be parallel to the sides of the frame are now diagonal. A bit of a false etymology, the technique actually debuted in German film in the early 1900s, rather than in the Netherlands. The goal, from a filmmaking viewpoint, is to use this angle to suggest tension or unease.
For still photography, the impact is not quite the same. Here, photographers tilt the camera to turn “boring” horizontal or vertical lines into “more interesting” diagonal ones. This creates dynamic leading lines that attract the viewer’s eye to a specific part of the image.
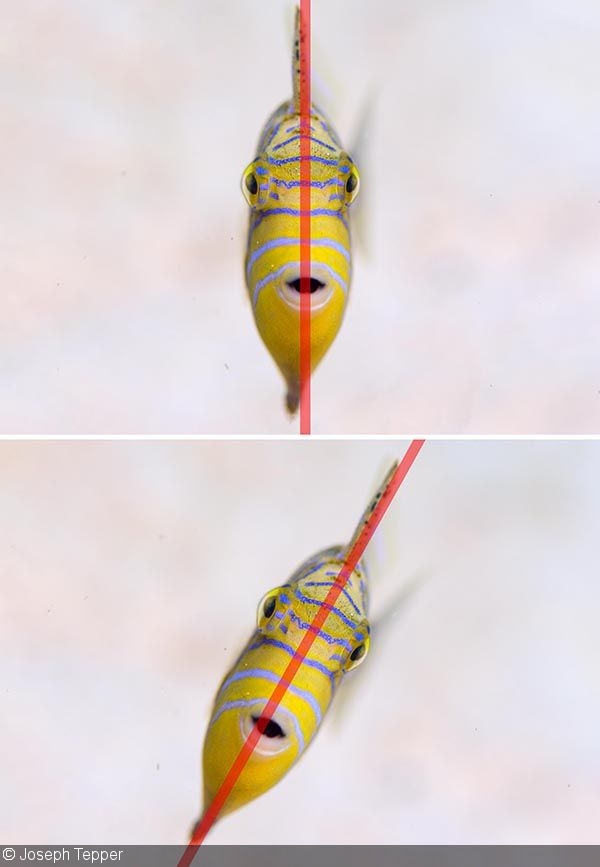
Originating in film, the Dutch angle uses camera tilt to create diagonal lines. The image of the filefish vertically straight (left) isn't as interesting as the intersecting diagonal lines of the fish and rope (right)
Camera Tilting in Underwater Photography
Here’s a dirty secret: You can rotate an image in post processing to create diagonal lines. Unfortunately, there are several disadvantages to doing this as opposed to doing it during capture.
First and foremost, it means you weren’t thinking about creating diagonal lines in the moment. This means you’re doing it as an afterthought, rather than an intentional act. In a similar way, the best black and white images are the ones that you imagined as being monochromatic during the dive—not just messing around in Adobe Lightroom.
The symmetry of the fish's face remains while a diagonal line is added to the image by tilting the camera (top image adjusted in post-processing for illustration)
Secondly, there is the matter of lighting. Traditionally, your strobe(s) will be located on the side of your housing, but when you tilt the camera, you’ll need to move the strobes as well to produce an evenly lit image. It is similar to the repositioning of strobes needed when you rotate from landscape to portrait orientation. Alternatively, you can bring your strobes in tight to avoid creating shadows when rotating the camera.
When we talk about rotating, it can vary from just a few degrees (5–15°) to a full rotation of 90°. Typically, to create a diagonal line from one corner of the frame to the other, you’ll want to tilt the camera 45°, either counterclockwise or clockwise.
You don’t have to create dramatic angles. Even tilting 15° adds a noticeable diagonal line to this image
Camera Tilt Underwater Photography Tips
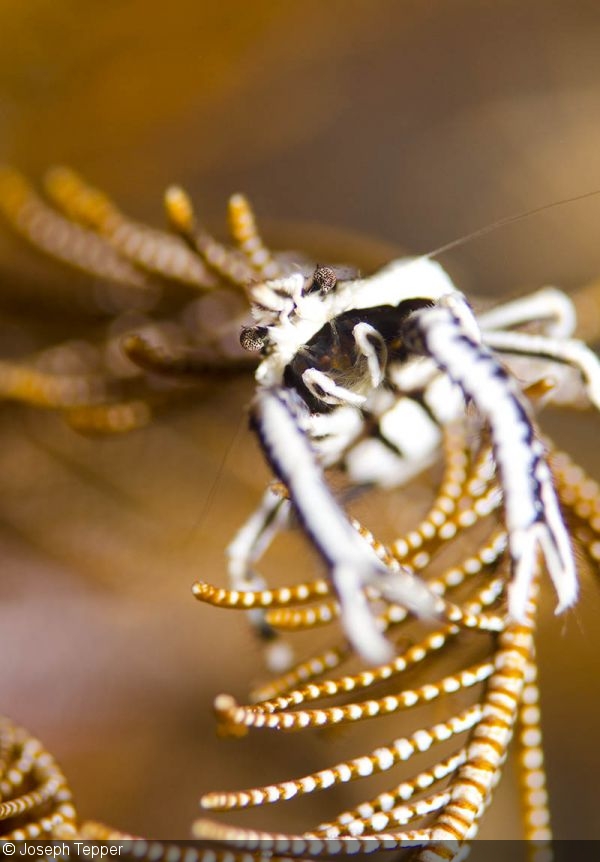
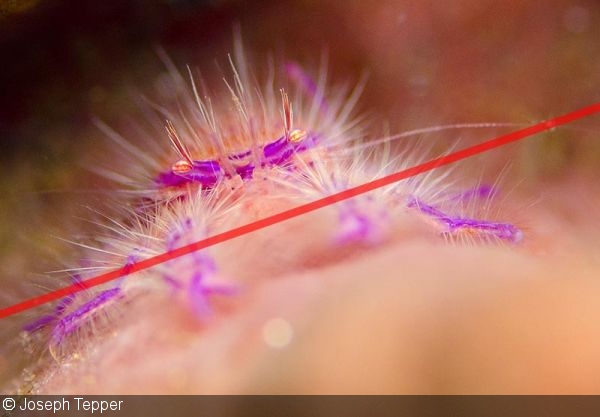
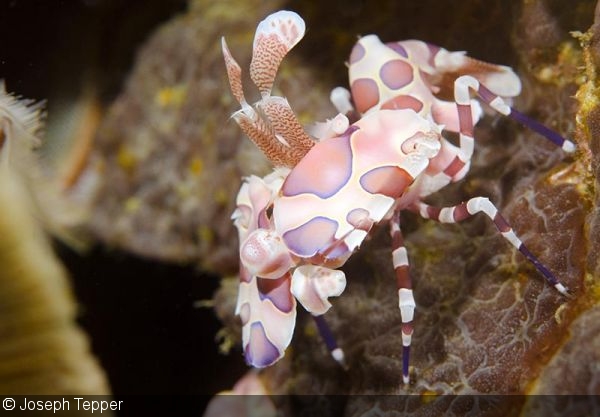
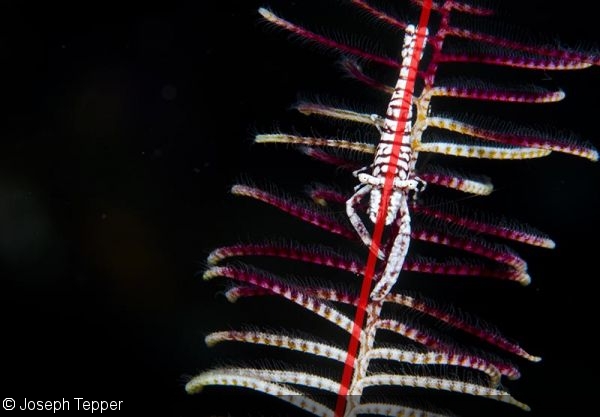
Picking the Right Subject: You can tilt your camera with a subject the size of your fingernail, all the way up to the big animals of the ocean, like sharks and rays. Typically, though, it’s easiest to start with something that’s not moving. A blenny camouflaged on a flat surface or a crab hiding in a crinoid are prime examples, as they make it easy to fine-tune how much you’re rotating and the lighting conditions. Then, you can try to step it up with moving reef fish—and finally with big animal subjects for a unique image.
It's best to start practicing camera tilts on subjects that don’t move—such as this harlequin shrimp—to fine-tune composition and lighting
Negative Space Considerations: One critical quality to look for when considering when to tilt the camera is not the subject itself, but what is behind it. Black backgrounds or blue backgrounds work best, as they are the least disorientating—you simply can’t see the rest of the environment is being tilted to produce diagonal lines. If you don’t have a black background, consider using shallow apertures to slightly blur the negative space.
Black backgrounds are ideal for tilting the camera because the negative space remains the same, so the viewer isn’t disorientated
Strobe Positioning: As mentioned above, the more you tilt your camera, the more you’ll need to adjust your strobes. If you tilt 90 degrees, then your light source will be coming from above and below, rather than the sides. Be conscious of how much you’re tilting and ensure the strobes are evenly illuminating from the sides. Alternatively, consider shooting small enough subjects where you can pull the strobes in tight to the port, and there’s really no need to rotate if they are feathered out.
If you decide to tilt your camera, remember that your strobes will be moving as well! This is especially important when trying to achieve even side lighting in wide-angle scenes
When Not To Tilt: Tilting your camera to add diagonal lines is a great technique to have in your pocket. However, there are times when using it will have an undesired Dutch angle impact, making the viewer seem uneasy. This is especially true when you’re dealing with horizon lines on the reef or sand, or most notably taking over-unders at the surface. You probably want to keep a straight horizon line.
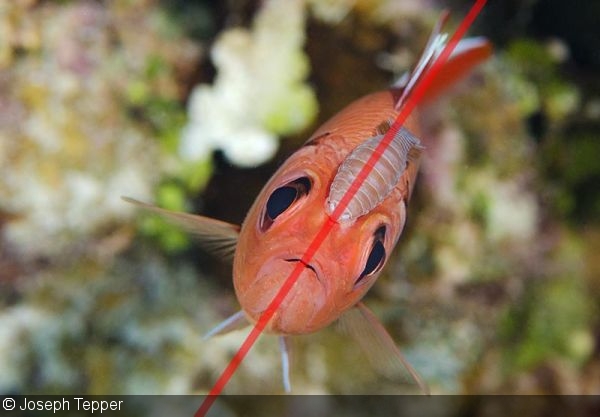
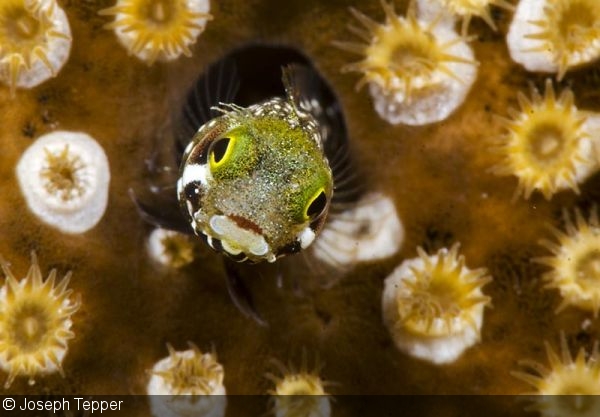
Head-On Composition: Head-on compositions of macro and medium-sized subjects are a great time to tilt the camera. Here, you are combining the symmetrical nature of their facial features with the leading lines produced by the tilt. It’s a bit tricky for moving subjects, but when well executed can have interesting results.
Head-on images of fish make for great tilt opportunities as it adds some character to the animal
Final Thoughts
If you scroll through your Instagram or Facebook photo feeds, you are likely to see many non-photography friends tilting their smartphones—but they probably don’t know why it makes the images look cooler. Now you do! From its origins in the film industry as the Dutch angle, tilting the camera artificially adds leading lines to make your image more dramatic.
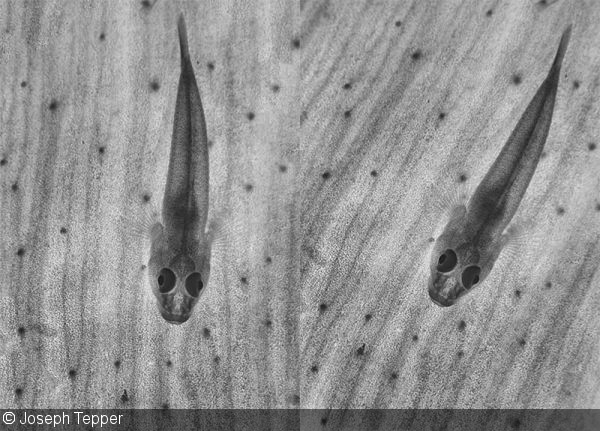
The completely straight goby on a soft coral (left) isn’t nearly as interesting as the diagonal lines in the coral and the fish’s body created by camera tilting (right)
RELATED CONTENT
Featured Photographer




 Antarctica


