Underwater Photography with Models
By Jason Heller
The Stylistics and Michael Jackson both knew it – People Make the World Go ‘Round. Including a diver or other model in your images can help the viewer relate to the experience, feel the emotion of the moment and understand a sense of scale. If you take the time to select the right model and plan your shots, you will be on your way to creating great images that incorporate the human element. Underwater photography using models is, for the most part, wide-angle photography, so if you do not fully understand the basics of wide-angle photography, it’s best to start there.
Selecting a Dive Model
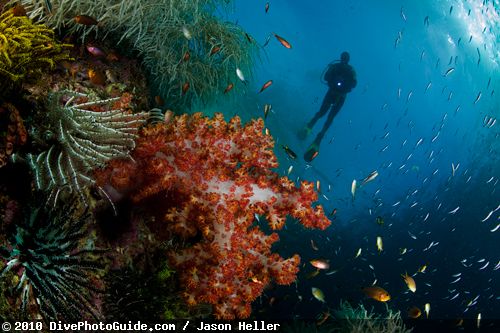
You think to yourself, “A little to the left…down a little”, but of course the diver in the background can’t hear you. In fact, he or she doesn’t even know that they are part of your composition. A muffled click of the shutter later and what could have been your masterpiece image with a diver silhouette over the reef, is complete with flailing legs, dangling hoses and gauges, and bubbles all over the place. Using Jedi mind tricks to try and get a diver who has become your unknowing model to move into position might work once in a while, but as a general rule, it just doesn’t work. It’s much better to use a predetermined model.
For most photographers, the easiest option is working with your spouse, dive buddy or dive guide as your dive model. Whoever you choose, it will require planning and communication.
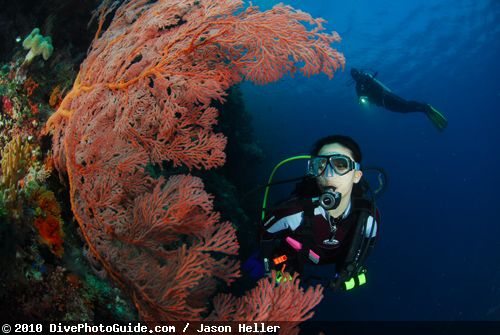
Using another diver on the boat is somewhat unrealistic because they want to enjoy their own dives, but it can work out sometimes. If you are really serious about using a model, offer them a small fee or to pay for their dives. With the right model, you may create several fantastic images over the course of a dive or two. What’s that worth to you?
What Makes a Good Model
Excellent buoyancy and a respect for the environment are the first requirements of your budding model. If the model does not possess perfect buoyancy, he or she will not be able to maintain your desired positions and it will reflect in the images. Additionally, you risk disturbing the environment.
Let’s face it, image is everything and your model should look good. In the case of dive models, this means selecting a model with the right body type and dive gear. Generally tall models work better than short ones, particularly when using them as silhouettes in the background. Certain dive gear can also help make your model look better:
- Colorful dive gear is always a plus, as it creates contrast against the blue water.
- A large frame mask with a clear skirt will allow the light to enter and help accentuate the diver’s eyes
- Long solid fins are more aesthetically pleasing than split fins in photographs
- A compact regulator will help prevent the diver’s mouth and cheeks from looking like…well, like they normally do when you’re diving.
Planning the Shot
Adding the human element to your images takes planning and preparation, and never forget that it is a team effort.
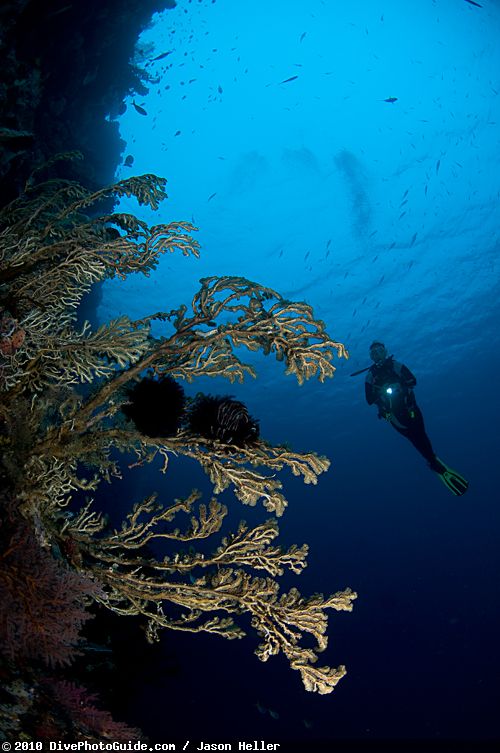
Logistically you have two types of images. One where a diver is part of the foreground, and one where the diver is in the background and either lit by ambient light or silhouetted.
Model In The Foreground
If the diver is in the foreground the key is to position the diver such that you can illuminate their eyes. This is best accomplished with two strobes, where one strobe is dedicated to the purpose of lighting the diver. (If you only have one strobe, consider using your model as sole subject or photographing the model in the background of your image.) Be careful with your strobe power settings, as too much light can be reflective in the mask, or overexpose paler skin. In the resulting images, the eye contact created by the proper illumination inside of the mask can help make a connection with the viewer. When the model is in the foreground, he or she can be the primary or secondary subject. By having your model look at another element of the foreground rather than the camera, it can pull the viewers’ eyes through the image.
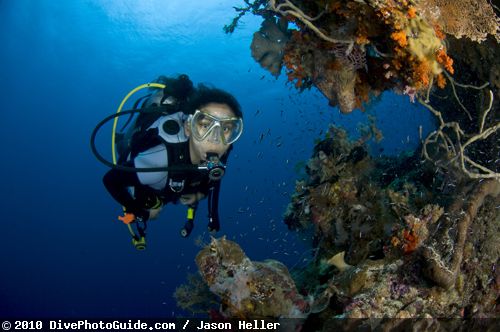
If you are using a compact camera, get as close as to your subject as your camera’s minimum focus distance will allow when zoomed all the way out. It will help to use an additional wet lens in order to maintain a wide angle of view as you get in closer. Of course getting close will allow for better lighting as well, minimizing the distance light has to travel in water.
With an SLR you may want to use a rectilinear wide angle zoom lens to prevent distortion of the model, which sometimes occurs when using a fisheye lens. Ideal lenses have a minimum focus distance of around 12” or less with focal ranges from 10-24mm. Remember to check with your housing manufacturer or retailer to determine whether or not your lens requires a diopter in order to obtain the sharpest images. Most mid-range zooms do. The reason for the diopter and desire for a short minimum focus distance has to do with the ability to focus on the virtual image created by your dome port. (You can learn about virtual images here.)
Model In The Background
When a model is photographed in the background, he or she will either be entirely lit by ambient light or silhouetted against the blue water background. Therefore, a key to creating pleasing images with models in the background is to make sure not only the model looks good, but the blue water does as well. This involves ambient light metering, and careful review of your LCD screen.
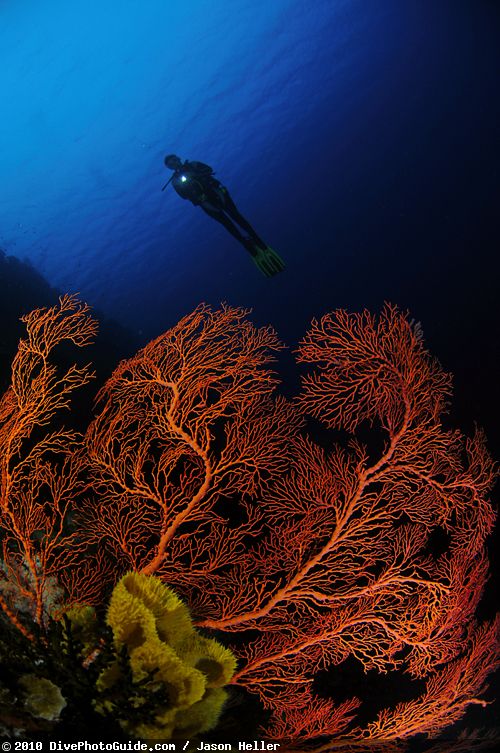
If you are not silhouetting your model it is important that they are in some type of pleasing ambient light. There is a point between silhouetted and exposed that just looks really bad and washed out. You’ll know it when you see it. The diver should either be close enough to you or your subject that they are lit by the sun, or far enough away that you can silhouette them against the water and/or sun. Be aware of where the middle ground lies for any scene and avoid it if possible. This will be different for every lighting scenario.
Sometimes the model looks best lit by ambient light, particularly when you are looking for a sense of scale and grandeur, like swimming next to a large wreck. Other times the silhouette works best, particularly when the primary subject is close in the foreground and well lit. But experiment, and have fun. You can even try to silhouette both the subject and model.
When the diver is in the background a fisheye lens will work very well, allowing you to get closer to your foreground subject. If you are using a compact camera, a fisheye wet lens is a great tool for underwater photography with the model in the background. With an SLR, a fisheye lens, like a Tokina 10-17mm, Nikon 16mm or 10.5mm or Canon 15mm, is your best bet. This will also allow you to force perspective with close focus wide-angle photography, utilizing an interesting foreground subject as the main point of focus while the model is primarily used as a way to create balance and interest in the background.
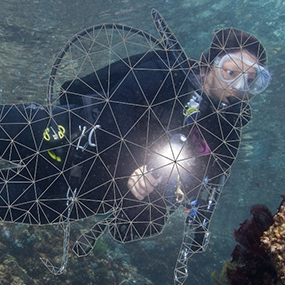
One common trick to add additional dimension and interest to the diver part of your composition is to have them holding a light aimed at something (sometimes even aimed at nothing). The light must be very powerful in order to look good and should never be aimed directly at the camera lens. It adds an additional compositional element to the image, but can easily be overused. Use this technique sparingly.
Bubbles Or No Bubbles
Bubbles are a very subjective element of composition. Of course, we exhale bubbles while diving, and you’ll see many underwater images with divers exhaling bubbles. Sometimes bubbles can make an image look authentic, particularly if the bubbles are not infringing on other compositional elements. But on the other hand, your negative space is part of your composition, and if having a clean blue negative space is part of your creative vision you’ll need to coach your model on how to avoid bubbles in your images. Again, this is totally subjective, as is composition in general.
Can You Hear Me Now?
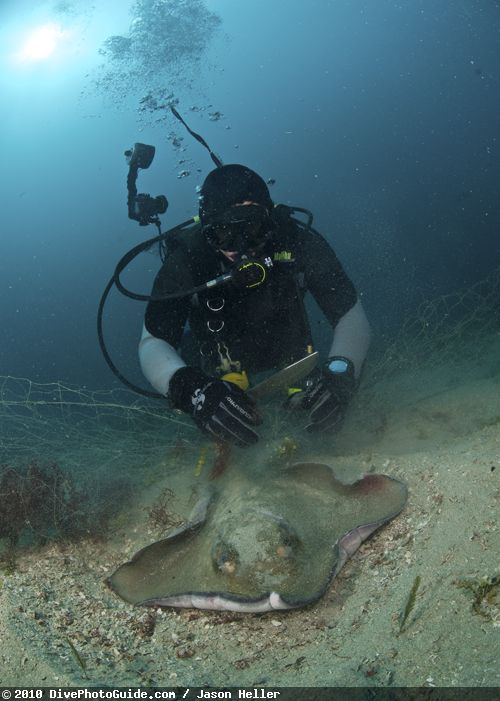
Since we can’t communicate during our limited time underwater, you’ll need to develop custom hand signals and make sure that your model understands them before the dive. Some key hand signals include you will want plan with your model before the dive include:
Since we can’t communicate during our limited time underwater, you’ll need to develop custom hand signals and make sure that your model understands them before the dive. Some key hand signals include you will want plan with your model before the dive include:
- Move up, down, left and right
- Specific body angles
- Swim into the scene, out of the scene
- Where to look
- Legs apart and legs together
- Bubbles or no bubbles
- Light on or off
Shoot, Review, Repeat
Digital photography offers us the opportunity to use surface intervals to review your results together with your model. Note what is working and what needs to be improved. Both the photographer and model should refine your approaches accordingly. You gain the additional benefit of getting your model excited about the collaboration and the results. It’s important to keep them motivated in order to maximize the outcome of working together.
If you follow these basic tips and guidelines, you’ll have the basics to underwater model photography down in no time. However, if you really enjoy photographing humans underwater this can be just the tip of the iceberg and with practice, you can get really creative.
RELATED CONTENT
Be the first to add a comment to this article.
You must be logged in to comment.
Support Our Sponsors
Newsletter
Travel with us
Featured Photographer

Alexander Safonov
Photographer
My affair with underwater photography started with a basic curiosity about taking pictures underwater two and half years ago, and rapidly became my biggest hobby, which consumes enormous chunk of my free time now! My favorite...
Follow Us
Sponsors
 Antarctica


